 shorthand-
typists and
secretaries manual
typewriters carbon
copies the Banda
copier the overhead
projector
(OHP) OHP
transparencies use of OHP
transparencies publishing
before the
digital era preparation of
camera-ready
copy
Transparencies for the OHP and their preparation mid-20th century
Based on experiences when the overhead projector was the most common means of projection
Transparency sheets
A transparency is a thin sheet of transparent flexible material used with an overhead projector. The individual presenting to an audience writes or draws onto the transparency and the overhead projector enables it to be projected onto a screen.
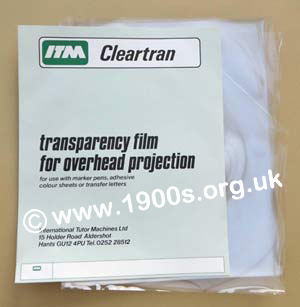
Stack of blank overhead projector transparencies
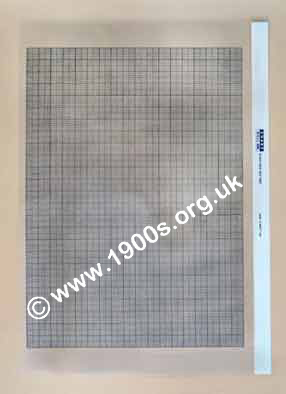
Transparency showing the white handling strip and a photocopied image of graph paper
I understand that transparencies were also known as acetates, foil and viewfoil, but the only terms ever heard were transparencies and acetates.
Today transparencies and overhead projectors have largely been replaced by video projectors and interactive whiteboards they were the best system of projection a few decades ago. I used them constantly in my lecturing work.
Separate sheets versus rolls
Transparencies came as separate sheets and rolls.
Separate sheets had the significant advantage that they could be prepared carefully before hand. They could be duplicated onto paper for distributed to an audience and kept for later presentations.
Rolls of poorer quality material were designed for single use. They could be written on during a talk which had the advantage of helping the audience to follow an argument. Once a screenful had been used up, the roll could be wound on as required. The photo on the overhead projector page shows such a roll attached to the projector.
Coating
The sheets were coated with a type of acetate which held writing without it separating out into globules. This coating came off slightly when handled and it affected the skin. So there was a white strip at the side for handling. It was difficult, if not impossible, to prepare the transparency without handling it outside the special strip, and I for one used used to feel my fingers slightly numbed and uncomfortable afterwards. After a good wash they felt back to normal.
Later, transparencies were developed without the strip, so were presumably deemed safe for the skin. They were also developed to take photocopying.
Pens for preparation
Special pens were needed to write on the transparencies. They were available in several colours and thicknesses and came in two types: permanent and non-permanent. The permanent ones always seemed to come with black outsides, so as to tell the two types apart at a glance.

Non-permanent transparency pen

Permanent transparency pen - black outside
These pens were widely known as OHP pens
There were advantages and disadvantages to each type. With non-permanent pens, errors could easily and quickly be erased with a damp cloth, so allowing rethinks, but care had to be taken to keep them away from anything wet. Stories got around of teachers carrying them between buildings in the rain and finding to their obvious consternation that they were blank on arrival.
Permanent pens, while not having this disadvantage did not allow for errors or rethinks.
How to prepare transparencies
It was of course perfectly possible to make a transparency very quickly indeed by simply writing on it with an appropriate pen. However, for special presentations, particularly company meetings, something more professional was expected. (Remember this was at a time when word processors were in their infancy and printers were unsophisticated with only one font and font size at a time.)
How to vary fonts
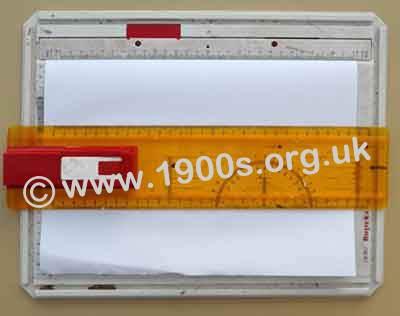
The only ways to get changes in font types and sizes was to use stencils or rub-on letters. Both very labour intensive because of having to line up each letter with the adjacent ones, and it required special drawing boards with moveable ruler and clips to hold the transparencies in position. Nevertheless, it was common practice.
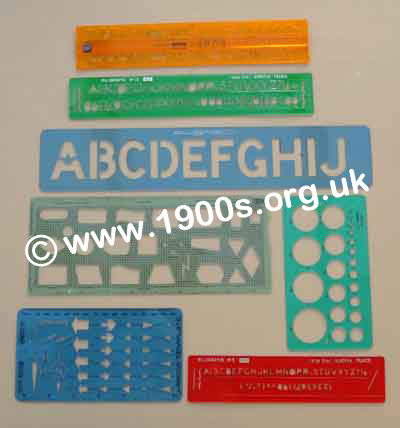
Stencils and drawing boards
Rub-on letters / dry transfer letters / Letraset
Another way was to use rub-on letters, also known as dry transfers which went by the trade name of Letraset. This was equally labour intensive because of lining up the lettering.

Sheet of dry transfer lettering
A range of stencils and dry lettering sheets were the tools of the trade for whoever had the task of making professional-looking transparencies, as were the special drawing boards.
| sources | webmaster | contact |
Text and images are copyright
If you can add anything to this page or provide a photo, please contact me.

